Are you pondering the number of spray paint cans it will take to rejuvenate your vehicle with a fresh coat? If so, I understand that quandary all too well. After delving into a wealth of research, I’ve uncovered that there’s no one-size-fits-all answer.
Allow me to share my insights and offer some practical advice for using those aerosol cans effectively on your car. Prepare yourself, as we’re about to embark on an adventure in auto transformation—equipped with just the perfect amount of paint!
Understanding Car Painting with Spray Cans

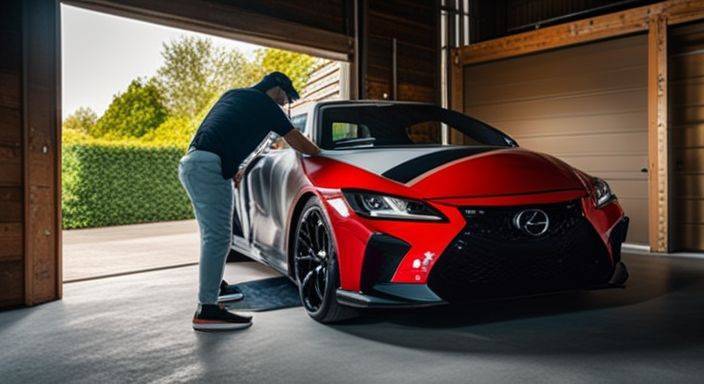
Spray cans offer a DIY solution for giving your car a fresh coat of paint. You can find these cans at an automotive paint store or even online. They’re perfect for covering small areas like a rear bumper or touching up spots where the original paint might have chipped off.
With spray painting, you control the pace and thickness of each layer. It’s crucial to prep your car before starting; this means washing away dirt and old wax, fixing scratches, and sanding the surface to help the new paint stick.
Using spray cans takes patience but saves much money compared to a professional shop job. Think about it like coloring with markers instead of painting with broad strokes – you need to be precise and careful.
Spray in thin coats to avoid drips and get that nice finish we all want on our cars. Between each coat, let it dry completely so that the next one sticks well too! Keep going until you’ve covered the whole area evenly.
Factors Determining the Number of Spray Cans Needed

When it comes to transforming your car’s appearance with spray paint, the number of cans you’ll need hinges on a blend of crucial factors. It’s not just about picking up a few cans; we must consider elements like the vehicle’s dimensions and our vision for the final look to ensure we’re fully stocked before diving into the job.
Size of the car
So, you’re ready to give your car a fresh new look with some cans of spray paint. The size of your ride is key in figuring out how many cans you’ll need. If you’ve got a small car like a Nissan Sentra, fewer cans will do the trick.
But let’s say you’re working on something bigger like a Dodge pickup – that’s going to take more.
Each part of the process takes extra paint for larger cars. You’ll need more primer to cover the whole thing evenly. When it’s time for the top coat, again, more surface area means more spray cans needed for full coverage.
Even the smaller details add up; things like sandpaper and tape are used in greater amounts when working on bigger vehicles. And if space is tight? A large vehicle might just call for an even larger painting spot so everything gets done right without trouble from fumes or lack of air flow.
Number of coats required
Moving from the size of your car to how much paint you’ll need, the number of coats is crucial. For a smooth finish, apply at least 2 coats of paint. Give each layer about 10 minutes to dry before adding another.
Most cars look their best with 2-3 layers. This makes sure you cover every inch evenly and hide any old colors or marks.
Using good quality spray cans helps too. You want your car looking sharp, not patchy! If it’s a full car paint job, plan for around 2 gallons total. Every coat needs to be even for that professional look.
Take your time – rushing can mess up all your hard work!
Type of spray paint used
The type of spray paint I choose impacts how many cans I’ll need. Automotive spray paint works best because it sticks well to the car and lasts long. If I pick metallic paints or want a special finish like a flat black, these often require more coats for full coverage.
The good stuff from quality brands usually covers more area than cheaper options.
I always make sure my paint matches the rest of the car unless I’m painting the whole thing a different color. Using clear coat after painting adds protection and makes my car shine.
It’s an extra step but definitely worth it for that perfect finish against UV rays and scratches.
Step-by-step Guide to Painting a Car with Spray Cans

Diving into the step-by-step guide on painting a car with spray cans, I’ll lead you through each crucial stage to ensure your DIY project looks nothing short of professional—stay tuned, because there’s plenty to cover.
Preparing the car’s surface
I’m getting ready to paint my car with spray cans. It’s important to know that a clean and smooth surface is key for a great paint job. Here’s how I prepare my car’s surface before painting:
- First, I grab my 600 – grit sandpaper and sand the entire car. This roughs up the factory paint, so the new paint sticks better.
- Next, I check for any dents or holes. If I find any, I use putty to fill them in.
- Once the putty is dry, I take my 1200 – grit sandpaper and sand those areas smooth.
- Then, it’s time to wipe down the whole car. A dry cloth and cellulose thinner do the trick to remove any dust or grease.
- After that, I tape off areas like windows, lights, and trim with masking tape and paper. This keeps paint off places where it shouldn’t go.
- For parts like door handles or mirrors that can be removed, I take them off. Painting these small parts separately makes the job easier.
Applying primer
Applying primer is a critical step in painting a car. It ensures that the paint sticks well and lasts long. Here’s how to do it right:
- First, I make sure the car is clean. I use soapy water to remove all dirt and grease.
- Next, I grab 600 – grit sandpaper and sand the entire area of the car smoothly.
- For any holes or rough spots, I apply putty. After it dries, I sand these areas with 1200 – grit paper until they’re even with the car’s surface.
- Now, it’s time for primer. I shake the can of primer well before starting.
- Holding the spray gun about six inches from the car’s surface, I start applying an even coat of primer.
- It’s important to move my hand steadily as I spray. This helps avoid drips or uneven layers.
- After finishing the first coat of primer, I wait for 15 minutes.
- Once dry, I apply a second coat using the same method as before.
- Another 15 – minute wait follows before adding a third coat. Patience here is key for good results.
- Finally, after spraying three coats, I let the primer cure as recommended by its manufacturer.
Spraying the car
I’m ready to spray paint my car and I’ve got everything set for a smooth job. Here’s how I do it step by step:
- First, I make sure the car is in a well – ventilated area; safety comes first!
- Next, wearing my mask and goggles, I grab the cans of primer.
- I shake each can well before use to mix the paint properly.
- Then, starting from the top and working down, I apply three even coats of primer.
- I keep the rattle can about 10 inches away from the car’s surface for best coverage.
- Moving in steady back-and-forth motions ensures no spots are missed.
- After each primer coat, I wait 15 minutes before spraying the next layer.
- Once priming is done, it’s time for color! Again, shaking each can is key.
- With smooth and controlled movements, I cover the large areas like doors and hood first.
- For smaller sections like the front bumper cover and engine bay, careful attention is needed to avoid drips.
- Even coats are crucial here – not too thick or thin. This avoids runs and orange peel texture.
- Between color coats, drying time is important. Patience pays off with a great finish!
Tips for Effective Spray Painting

When it comes to giving your car a fresh coat of paint with spray cans, success lies in the details.. and a little know-how goes a long way. I’ll share essential tips that will help you achieve an even finish and enduring results, ensuring every ounce of effort pays off beautifully on your automotive masterpiece.
Ensuring even coating
To get an even coating, start by cleaning and sanding the car’s surface. This helps the paint stick better. Use grit sandpaper to smooth out any rough spots. After that, grab some cellulose thinner.
Wipe down the whole area you’ll be painting. This step is key for a clean finish.
Next, cover parts of the car you don’t want painted with tape and paper. Take your time here to do it right; this will help keep your paint job looking sharp and professional.
Now hold the spray can about 10 inches from the surface as you paint. Move in smooth motions to avoid drips or splotches.
Let’s talk about drying time between coats..
Allowing adequate drying time between coats
I make sure each spray paint layer has time to dry. Rushing can lead to a messy finish. Paint needs patience. I apply a coat and wait at least 10 minutes before the next one. This waiting is crucial for getting an even surface that looks smooth.
While I let the layers set, I keep my gear ready for the next step. That way, as soon as it’s dry, I’m all set to go again. Next up is maintaining the right distance while spraying for best results.
Maintaining proper distance while spraying
Hold the can about 25 centimeters away from your car’s surface. This distance helps you avoid drips and gets a smooth finish. Move your hand steadily as you spray. Paint evenly, covering every area with care.
You’ll see a professional look start to show.
Keep that can moving in straight lines across the body. Overlap each stroke a little bit for complete coverage. Stay focused; it’s easy to miss spots or get too close. Trust me, keeping this steady pace makes all the difference for your car’s new coat of color! Now, let’s talk about safety measures when using spray cans….
Warnings to Consider When Spray Painting a Car

When I embark on the journey of spray painting my car, I must acknowledge the array of warnings that come with this task.. Safety is paramount and being aware of potential pitfalls can be as crucial as the paint job itself.
Safety measures
Painting your car is more than just making it look good, it’s about staying safe too. I always make sure to paint in a well-ventilated area. This keeps the air clean and helps me breathe easier.
Wearing a mask and goggles is a must for me because they protect my lungs and eyes from spray particles.
Before I start spraying, I cover parts of the car that don’t need paint with painters tape and paper. Overspray can be messy, so this step keeps everything neat. Using sandpaper and putty gets the car’s surface ready for a smooth finish.
It’s important work but makes all the difference for an even coat. Safety first means better results in the end!
Potential mistakes to avoid
I’ve learned that jumping into spray painting a car without a plan can cause big problems. One major slip-up is not having enough cans for the whole job. You don’t want to stop in the middle because you’ve run out of paint, especially after multiple top coats.
Another thing to watch out for is skipping proper prep work on your car’s surface. If you don’t clean and sand it right, the finish won’t look good or last long. And never forget about safety! Always spray paint in a well-ventilated spot and wear protective gear.
It keeps you safe from fumes and accidents while working on your project.
The Aftermath: Maintaining the New Paint Job
Now that your car boasts a fresh coat of paint, it’s crucial to keep it looking its best. Proper maintenance goes beyond the initial application—it’s about ongoing care to ensure your vehicle continues turning heads down the road.
Regular cleaning
Regular cleaning keeps your car’s new paint job looking fresh. Use a soft cloth and mild soap to wash it often. Dirt and grime can damage the paint if left for too long, so make sure to clean your car regularly, especially after it has been exposed to harsh elements.
Protecting the finish is key. I always suggest using quality wax every few months to add an extra layer of protection against sunlight and rain. This care helps maintain that showroom shine and makes all your hard work pay off in the long run.
Keep up with these simple steps, and you’ll enjoy that sleek look for years!
Protecting the car from harsh weather conditions
Harsh weather can damage your car’s new paint job. Sun rays, rain, and snow all wear down that fresh coat of paint you just put on. To keep it looking great, park in the shade or use a car cover when possible.
This helps block those harmful UV rays that can cause fading.
Make sure to wash the car regularly too. Dirt and grime stick to the surface and can scratch the paint if they’re not washed away often. Use a gentle soap made for cars and dry with a soft towel to prevent water spots.
Cold winter months bring ice and salt from the roads which can rust your car. After driving through snow or icy streets, rinse off your vehicle as soon as you get home. Focus on getting rid of any road salt stuck on its body.
Moving forward, let’s talk about safety measures while spray painting.
Conclusion
In summary, you’ll need a good number of spray cans to refresh your car’s look. A smaller car might take about 8-10 cans while bigger vehicles may require more. Always remember to prep well and use even strokes for the best finish.
Paint patiently and allow each layer to dry thoroughly. With this approach, your car will shine with a new coat in no time!
